What Are Drywall Tape Bubbles?
Drywall tape bubbles are tiny raised blisters that develop around the taping used over seams that spoil the smooth appearance of the wall. These are the cases when the tape does not bond well with the compound. When you have a noticeable tape bubble, it is sometimes necessary to repair the tape bubble with a lot of attention in order to have a perfect finish.
Common Causes of Drywall Tape Bubbles
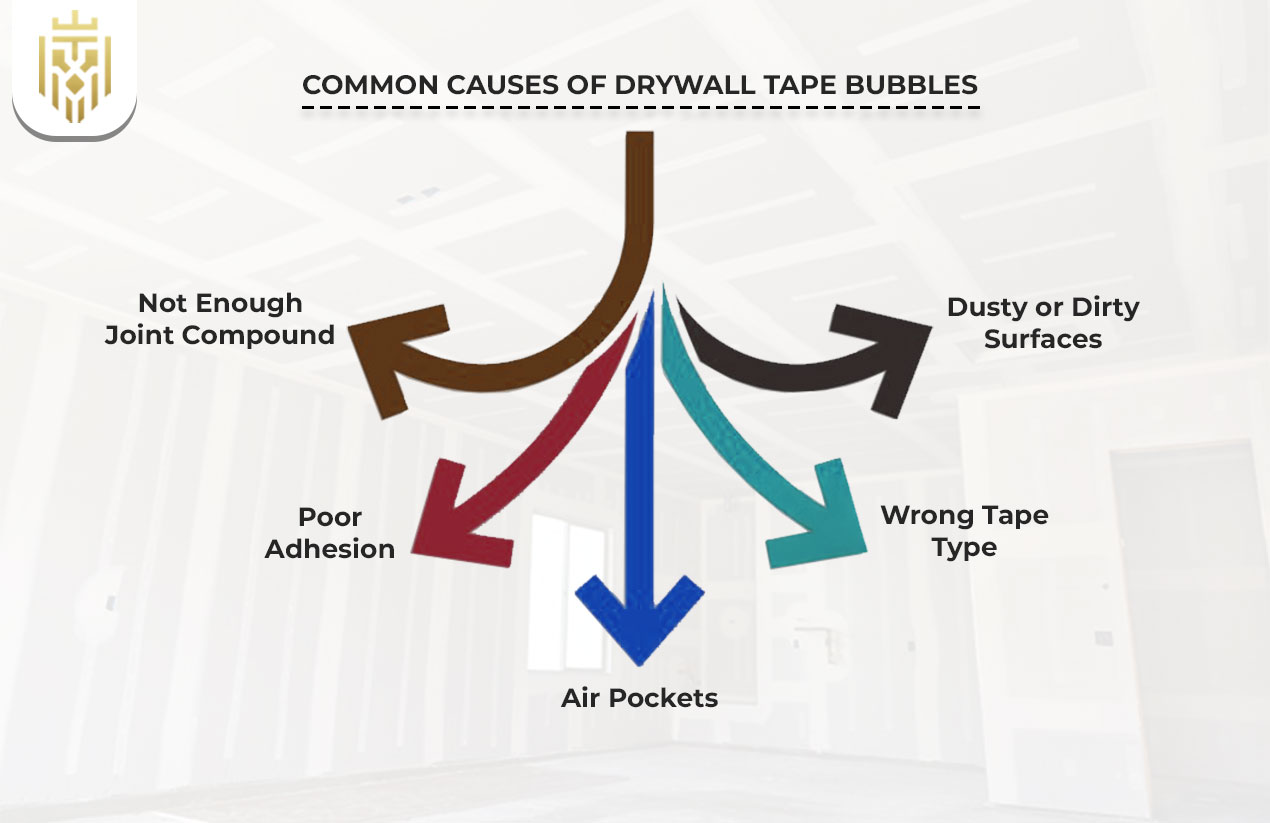
It is important to know how bubbled areas develop in order to prevent them. The cause can be poor adhesion, air pockets, or dusty surfaces, among several factors. All the causes might appear different, yet the outcome remains the same – ugly seams that require a fix to provide a smooth surface.
Not Enough Joint Compound
Excessive amounts of drywall applied may result in a bubble in the drywall tape because of insufficiently bonded tape. This problem is more pronounced once the drying is done, and more effort is needed. When conducting repair work, it is best to apply adequate mud to reduce wastage of rootwork.
Poor Adhesion
In cases when tape does not adhere well to the wall, the bubbles will form in the future. This occurs because of hurried application, moisture problems or poor bonding between tape and joint compound. It is advised to achieve good adhesion to ensure that there is no issue of drywall tape and the smoothness of the wall surface to be painted.
Air Pockets
Air trapped under the tape may result in unsightly raised spots. These air pockets resemble balloons; hence, seams appear to be lumpy. Knowing how to fix bubbles in drywall tape includes smoothing out these spots immediately before they harden, preventing further structural or cosmetic wall issues.
Wrong Tape Type
The selection of the improper type of tape may result in drywall tape bubbles that make the wall finish defective. In any case, paper tape should be applied accurately, and mesh tape is useful with some compounds. Pairing the type of tape used to appropriate mud is useful in producing a durable and clean result.
Dusty or Dirty Surfaces
Taping dusty, dirty or greasy drywall prevents adhesion, which causes a bubble of tape to form in the middle and also needs a rework. Bonding is guaranteed by ensuring that the surface has been cleaned properly before the application. It is one of the professional tips the experts use to ensure a lasting finish.
How to Fix Drywall Tape Bubbles?
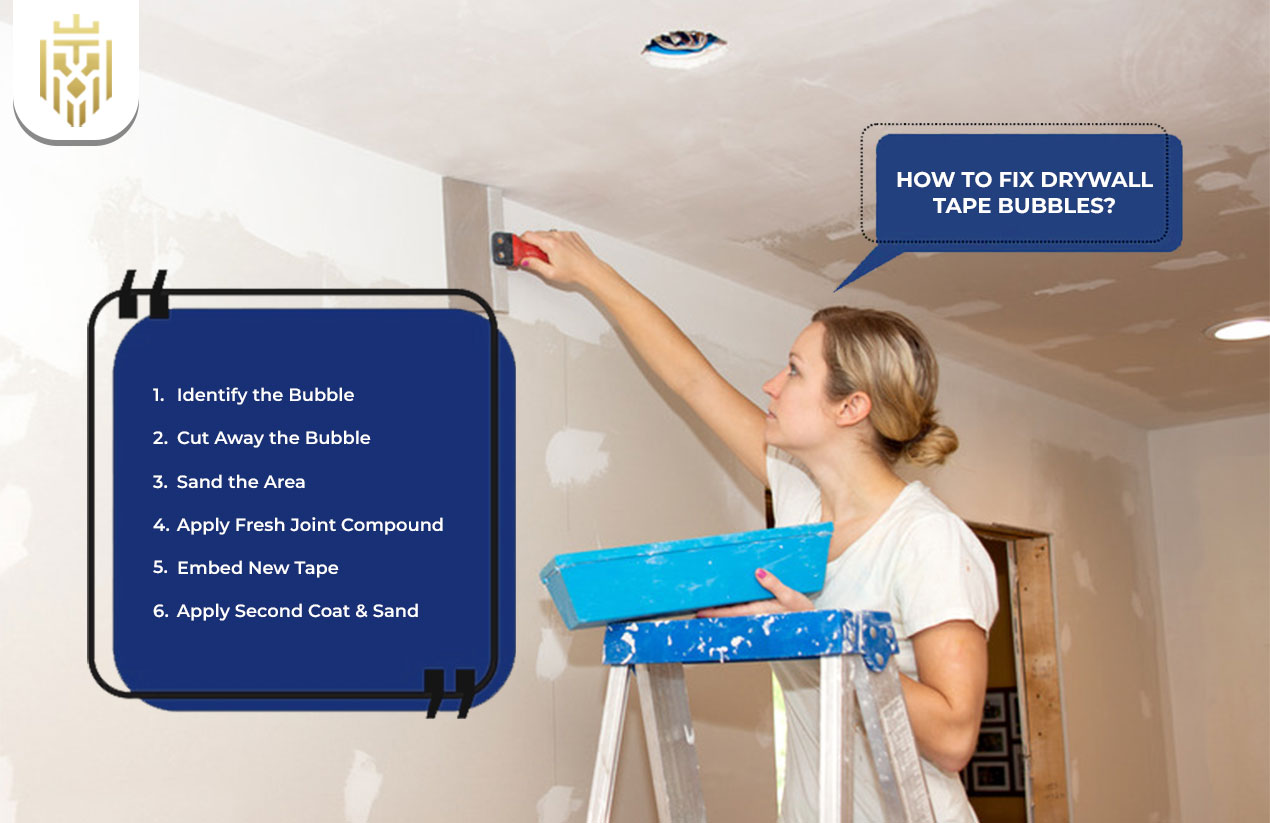
Bubbles in taped drywall take time to fix, and they must be done the correct way. Identifying and removing the damaged area, sanding, reapplying the compound, and incorporating new tape are all steps to make lasting results. These methods show homeowners exactly how to fix bubbles in drywall tape efficiently.
Identify the Bubble
The first step in learning how to fix bubbles in drywall tape is identifying the problem areas. Early detection of raised lines or bumps will result in quick repair and then painting. Close checking will play a role in maintaining a smooth surface on the wall and minimising the maintenance in the long term.
Cut Away the Bubble
The second step is to cut the bubbled part with a utility knife carefully. The raised area is removed, and further separation would not occur. Experts suggest removing the only part of the drywall taping that is dry and then applying the fresh material so that it can blend with the others.
Sand the Area
After the bubble is removed, sanding is used to smooth rough edges at the joint. Sanding of the surface is done properly, thus making the surface prepared to apply fresh compounds. Leaving this step out is likely to result in another bubble in the taped drywall, thus rendering the final repair to be less efficient and lopsided.
Apply Fresh Joint Compound
The gap that was left behind by the piece of tape is filled with a fresh coat of compound. To apply it all over will avoid noticeable lines and regain strength. In the absence of correct spreading, the drywall taping bubbles may recur, causing recurring repair and frustration during the finishing.
Embed New Tape
The new compound enables the introduction of new tape in the joint. Its smooth application helps to avoid air bubbles and provides correct bonding. The missing of this critical measure usually leads to the appearance of bubbles in the wall, which destroys the aesthetic and structural strength of the wall and needs to be repaired later.
Apply Second Coat & Sand
Thickness is then applied again as a second layer of compound over the repair, and sanding is used to take away the excess. This measure will take care that there are no drywall tape flaws. The correct layering and sanding are the most important professional tips that achieve a smooth surface to be primed and painted.
Tips to Prevent Drywall Tape Bubbles
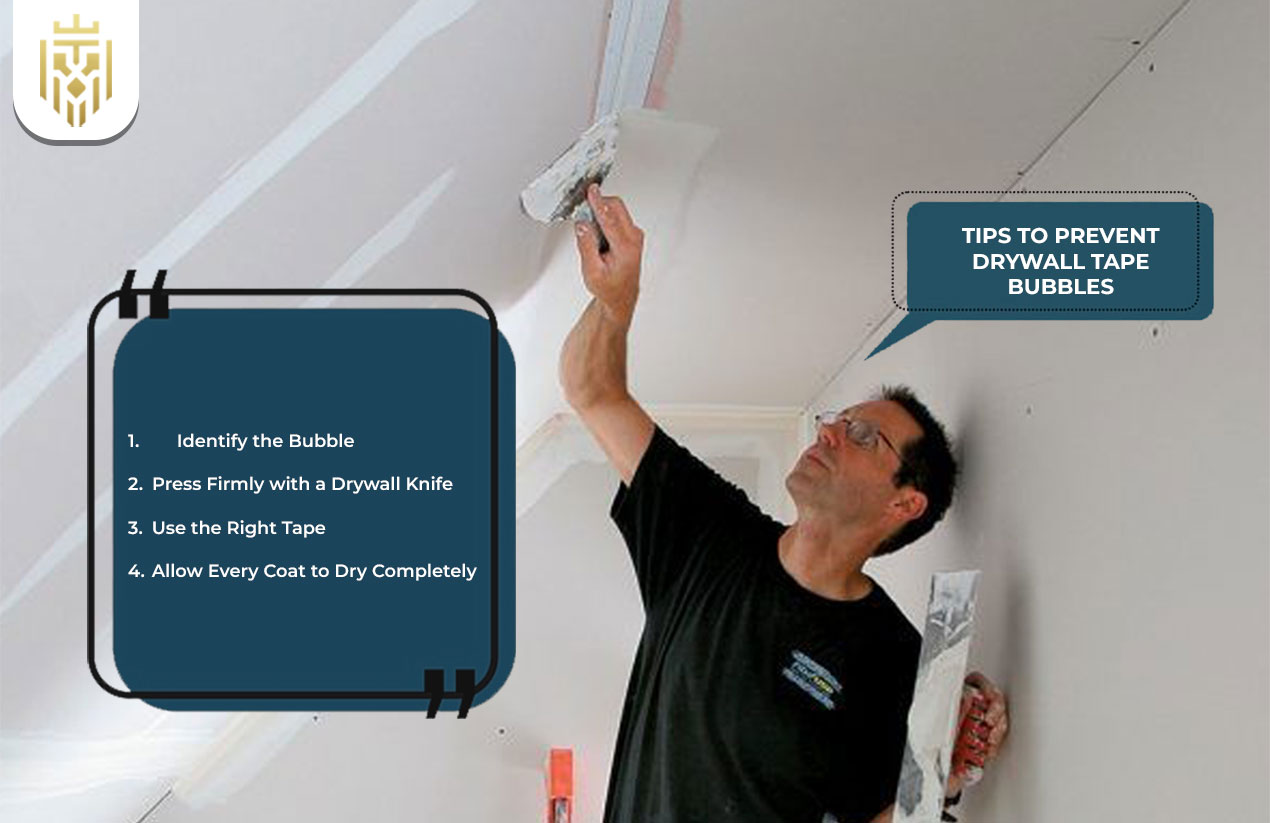
It is less time wasted on repairing than in preventing problems. Walls can be kept smooth through simple measures such as the amount of mud used, the tape used and making sure every coating of the wall is dry. These steps may be used to stop the formation of a tape bubble.
Apply the Right Amount of Mud
The proper amount of joint compound is used to avoid the formation of bubbles. Not enough ends up in gaps, and too much causes tape to float. Regular use will result in high bondages of drywall tape, and chances of undesirable flaws during the finishing phases will be reduced.
Press Firmly with a Drywall Knife
Hard application can remove any trapped air and minimise the possibility of drywall tape bubbles. A drywall knife is used in an appropriate manner to provide a smooth adhesion. This measure also reduces the chance of subsequent repair, making the surface homogenous and long-term effective in terms of the wall performance.
Use the Right Tape
The right choice of the tape type can prevent the problems of the tape bubbles in the future. Tapes based on paper and mesh operate differently; hence, it is essential to know which to use under certain circumstances. Fitment of the material to the type of composite is greatly beneficial to the finish quality and reduces the long-term wall issues.
Allow Every Coat to Dry Completely
Hurrying the process results in accumulation of moisture and mostly results in bubbles under the tape. Waiting so that each layer of compound is dry is recommended in providing more bond and trim seams. This drying period is necessary to avoid the appearance of the problems and provide a professional coating of the wall.
FAQs
1) What are drywall tape bubbles?
Drywall bubbles are bubbles formed beneath a drywall tape where the adhesion has failed. These flaws form lumpy walls, usually due to air entrapment or inaccurate paint application, and these need meticulous correction to achieve a smooth finish.
2) What causes drywall tape to bubble?
Poor adhesion, inadequate mud, air pockets or dusty surfaces are usually the cause of a bubble in the drywall tape. The tape is not bonded well to each issue, and the seams have bubbles that require repair.
3) How to Fix small Drywall Tape Bubbles?
In the case of small bubbles, remove the loose drywall tape, sand lightly, and put new compound on. The smooth way of embedding a new tape contributes to fixing the spot and avoiding the reoccurrence of imperfections.
4) How to prevent drywall tape bubbles?
To avoid the bubbles of the drywall tape, you should apply the necessary volume of the compound, press a drywall knife firmly, apply an appropriate type of tape, and leave each of the layers to dry fully before proceeding with the process.
5) How to Fix Large Drywall Tape Bubbles?
In the case of larger tape bubble issues, cut out the whole bubbled-out area, polish the surface, apply new compound and insert new tape. When adequately layered and dried, there is long-term repair and a professional outcome.